Chapter 3: Overview
Overview
Startup
web2py comes in binary packages for Windows and Mac OS X. They include the Python 2.7 interpreter so you do not need to have it pre-installed. There is also a source code version that runs on Windows, Mac, Linux, and other Unix systems. The source code package assumes that Python 2.7 or 3.5 (or even newer) is already installed on the computer.
web2py requires no installation. To get started, unzip the downloaded zip file for your specific operating system and execute the corresponding web2py file.
On Unix and Linux (source distribution), run:
python web2py.py
On OS X (binary distribution), run:
open web2py.app
On Windows (binary web2py distribution), run:
web2py.exe
On Windows (source web2py distribution), run:
c:\Python27\python.exe web2py.py
Attention, to run web2py on Windows from source you must install first Mark Hammond's win32 extensions from
http://sourceforge.net/projects/pywin32/.
The web2py program accepts various command line options which are discussed later.
By default, at startup, web2py displays a startup window and then displays a GUI widget that asks you to choose a one-time administrator password, the IP address of the network interface to be used for the web server, and a port number from which to serve requests. By default, web2py runs its web server on 127.0.0.1:8000 (port 8000 on localhost), but you can run it on any available IP address and port. You can query the IP address of your network interface by opening a command line and typing ipconfig on Windows or ifconfig on OS X and Linux. From now on we assume web2py is running on localhost (127.0.0.1:8000). Use 0.0.0.0:80 to run web2py publicly on any of your network interfaces.

If you do not provide an administrator password, the administration interface is disabled. This is a security measure to prevent publicly exposing the admin interface.
The administrative interface, admin, is only accessible from localhost unless you run web2py behind Apache with mod_proxy. If admin detects a proxy, the session cookie is set to secure and admin login does not work unless the communication between the client and the proxy goes over HTTPS; this is a security measure. All communications between the client and admin must always be local or encrypted; otherwise an attacker would be able to perform a man-in-the middle attack or a replay attack and execute arbitrary code on the server.
After the administration password has been set, web2py starts up the web browser at the page:
http://127.0.0.1:8000/
If the computer does not have a default browser, open a web browser and enter the URL.
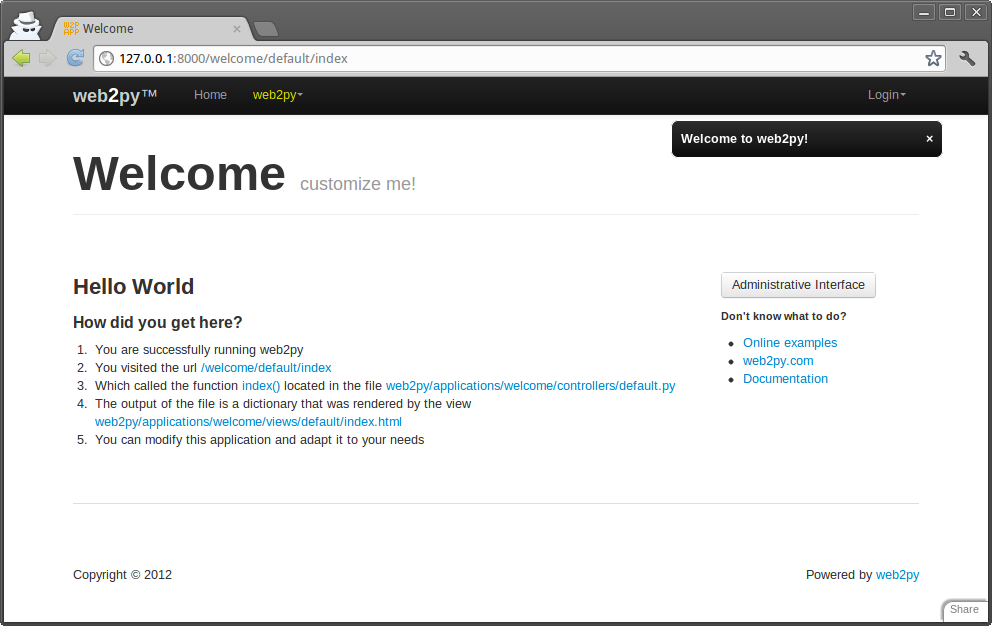
Clicking on "administrative interface" takes you to the login page for the administration interface.

The administrator password is the password you chose at startup. Notice that there is only one administrator, and therefore only one administrator password. For security reasons, the developer is asked to choose a new password every time web2py starts unless the <recycle> option is specified. This is distinct from the authentication mechanism in web2py applications.
After the administrator logs into web2py, the browser is redirected to the "site" page.
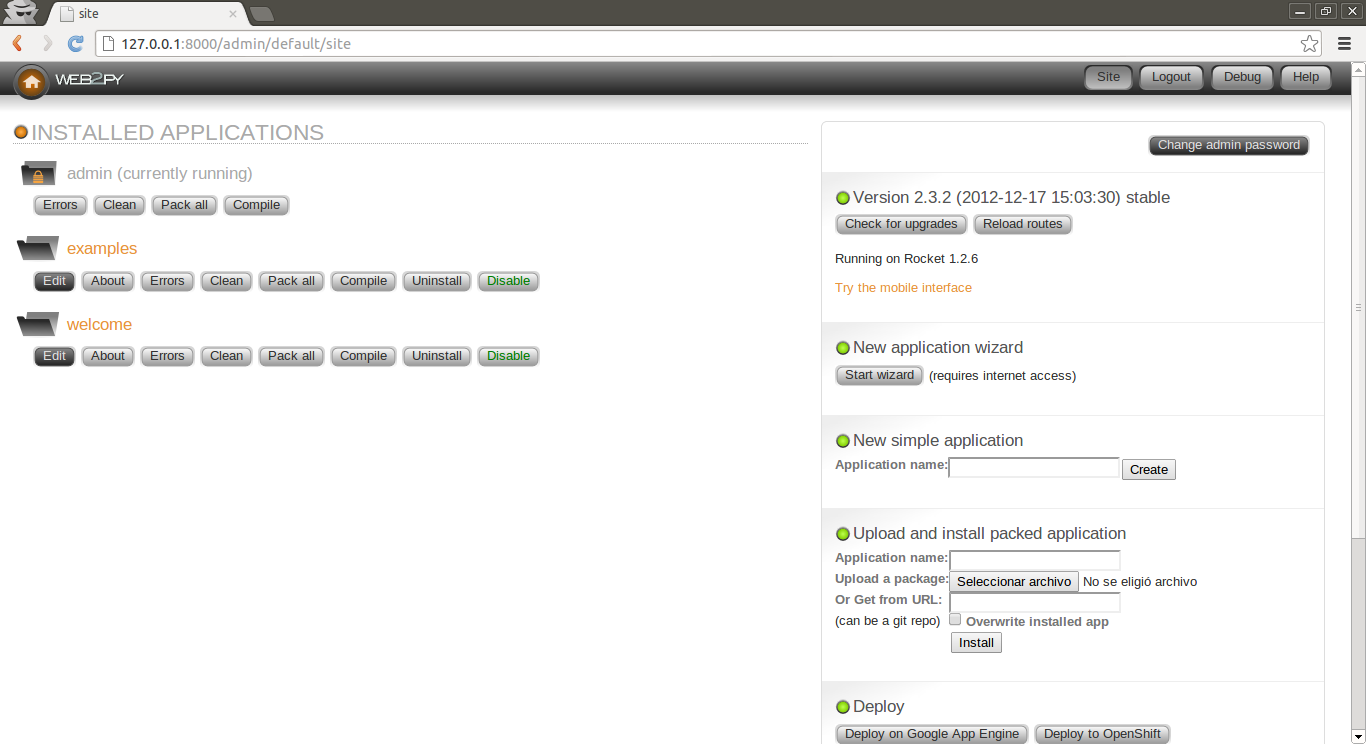
This page lists all installed web2py applications and allows the administrator to manage them. web2py comes with three applications:
- An admin application, the one you are using right now.
- An examples application, with the online interactive documentation and a replica of the web2py official website.
- A welcome application. This is the basic template for any other web2py application. It is referred to as the scaffolding application. This is also the application that welcomes a user at startup.
Ready-to-use web2py applications are referred to as web2py appliances. You can download many freely available appliances from [appliances] . web2py users are encouraged to submit new appliances, either in open-source or closed-source (compiled and packed) form.
From the admin application's site page, you can perform the following operations:
- install an application by completing the form on the bottom right of the page. Give a name to the application, select the file containing a packaged application or the URL where the application is located, and click "submit".
- uninstall an application by clicking the corresponding button. There is a confirmation page.
- create a new application by choosing a name and clicking "create".
- package an application for distribution by clicking on the corresponding button. A downloaded application is a tar file containing everything, including the database. You should not untar this file; it is automatically unpackaged by web2py when installed with admin.
- clean up an application's temporary files, such as sessions, errors and cache files.
- enable/disable each application. When an application is disabled it cannot be called remotely but it is not disabled from localhost. This means disabled applications can still be accessed behind a proxy. An application is disabled by creating a file called "DISABLED" in the application folder. Users who try to access a disabled application will receive a 503 HTTP error. You can use routes_onerror to customize the error page.
- EDIT an application.
When you create a new application using admin, it starts as a clone of the "welcome" scaffolding app with a "models/db.py" that creates a SQLite database, connects to it, instantiates Auth, Crud, and Service, and configures them. It also provides a "controller/default.py" which exposes actions "index", "download", "user" for user management, and "call" for services. In the following, we assume that these files have been removed; we will be creating apps from scratch.
web2py also comes with a wizard, described later in this chapter, that can write an alternate scaffolding code for you based on layouts and plugins available on the web and based on high level description of the models.
Simple examples
Say hello
Here, as an example, we create a simple web app that displays the message "Hello from MyApp" to the user. We will call this application "myapp". We will also add a counter that counts how many times the same user visits the page.
You can create a new application simply by typing its name in the form on the top right of the site page in admin.

After you press [create], the application is created as a copy of the built-in welcome application.

To run the new application, visit:
http://127.0.0.1:8000/myapp
Now you have a copy of the welcome application.
To edit an application, click on the edit button for the newly created application.
The edit page tells you what is inside the application. Every web2py application consists of certain files, most of which fall into one of six categories:
- models: describe the data representation.
- controllers: describe the application logic and workflow.
- views: describe the data presentation.
- languages: describe how to translate the application presentation to other languages.
- modules: Python modules that belong to the application.
- static files: static images, CSS files[css-w,css-o,css-school] , JavaScript files[js-w,js-b] , etc.
- plugins: groups of files designed to work together.
Everything is neatly organized following the Model-View-Controller design pattern. Each section in the edit page corresponds to a subfolder in the application folder.
Notice that clicking on section headings will toggle their content. Folder names under static files are also collapsible.
Each file listed in the section corresponds to a file physically located in the subfolder. Any operation performed on a file via the admin interface (create, edit, delete) can be performed directly from the shell using your favorite editor.
The application contains other types of files (database, session files, error files, etc.), but they are not listed on the edit page because they are not created or modified by the administrator; they are created and modified by the application itself.
The controllers contain the logic and workflow of the application. Every URL gets mapped into a call to one of the functions in the controllers (actions). There are two default controllers: "appadmin.py" and "default.py". appadmin provides the database administrative interface; we do not need it now. "default.py" is the controller that you need to edit, the one that is called by default when no controller is specified in the URL. Edit the "index" function as follows:
def index():
    return "Hello from MyApp"
Here is what the online editor looks like:

Save it and go back to the edit page. Click on the index link to visit the newly created page.
When you visit the URL
http://127.0.0.1:8000/myapp/default/index
the index action in the default controller of the myapp application is called. It returns a string that the browser displays for us. It should look like this:

Now, edit the "index" function as follows:
def index():
    return dict(message="Hello from MyApp")
Also from the edit page, edit the view "default/index.html" (the view file associated with the action) and completely replace the existing contents of that file with the following:
<html>
   <head></head>
   <body>
      <h1>{{=message}}</h1>
   </body>
</html>
Now the action returns a dictionary defining a message. When an action returns a dictionary, web2py looks for a view with the name
[controller]/[function].[extension]
and executes it. Here [extension] is the requested extension. If no extension is specified, it defaults to "html", and that is what we will assume here. Under this assumption, the view is an HTML file that embeds Python code using special {{ }} tags. In particular, in the example, the {{=message}} instructs web2py to replace the tagged code with the value of the message returned by the action. Notice that message here is not a web2py keyword but is defined in the action. So far we have not used any web2py keywords.
If web2py does not find the requested view, it uses the "generic.html" view that comes with every application.
Mac MailGoogle MapsjsonpIf an extension other than "html" is specified ("json" for example), and the view file "[controller]/[function].json" is not found, web2py looks for the view "generic.json". web2py comes with generic.html, generic.json, generic.jsonp, generic.xml, generic.rss, generic.ics (for Mac Mail Calendar), generic.map (for embedding Google Maps), and generic.pdf (based on fpdf). These generic views can be modified for each application individually, and additional views can be added easily.
Generic views are a development tool. In production every action should have its own view. In fact, by default, generic views are only enabled from localhost.
You can also specify a view with
response.view = 'default/something.html'
Read more on this topic in Chapter 10.
If you go back to "EDIT" and click on index, you will now see the following HTML page:

Debugging toolbar
For debugging purposes you can insert
{{=response.toolbar()}}
to the code in a view and it will show you some useful information, including the request, response and session objects, and list all db queries with their timing.
Let's count
Let's now add a counter to this page that will count how many times the same visitor displays the page.
web2py automatically and transparently tracks visitors using sessions and cookies. For each new visitor, it creates a session and assigns a unique "session_id". The session is a container for variables that are stored server-side. The unique id is sent to the browser via a cookie. When the visitor requests another page from the same application, the browser sends the cookie back, it is retrieved by web2py, and the corresponding session is restored.
To use the session, modify the default controller:
def index():
    if not session.counter:
        session.counter = 1
    else:
        session.counter += 1
    return dict(message="Hello from MyApp", counter=session.counter)
Notice that counter is not a web2py keyword but session is. We are asking web2py to check whether there is a counter variable in the session and, if not, to create one and set it to 1. If the counter is there, we ask web2py to increase the counter by 1. Finally we pass the value of the counter to the view.
A more compact way to code the same function is this:
def index():
    session.counter = (session.counter or 0) + 1
    return dict(message="Hello from MyApp", counter=session.counter)
Now modify the view to add a line that displays the value of the counter:
<html>
   <head></head>
   <body>
      <h1>{{=message}}</h1>
      <h2>Number of visits: {{=counter}}</h2>
   </body>
</html>
When you visit the index page again (and again) you should get the following HTML page:

The counter is associated with each visitor, and is incremented each time the visitor reloads the page. Different visitors see different counters.
Say my name
Now create two pages (first and second), where the first page creates a form, asks the visitor's name, and redirects to the second page, which greets the visitor by name.

Write the corresponding actions in the default controller:
def first():
    return dict()

def second():
    return dict()
Then create a view "default/first.html" for the first action, and enter:
{{extend 'layout.html'}}
<h1>What is your name?</h1>
<form action="{{=URL('second')}}">
  <input name="visitor_name" />
  <input type="submit" />
</form>
Finally, create a view "default/second.html" for the second action:
{{extend 'layout.html'}}
<h1>Hello {{=request.vars.visitor_name}}</h1>
In both views we have extended the basic "layout.html" view that comes with web2py. The layout view keeps the look and feel of the two pages consistent. The layout file can be edited and replaced easily, since it mainly contains HTML code.
If you now visit the first page, type your name:

and submit the form, you will receive a greeting:

Postbacks
The mechanism for form submission that we used before is very common, but it is not good programming practice. All input should be validated and, in the above example, the burden of validation would fall on the second action. Thus the action that performs the validation is different from the action that generated the form. This tends to cause redundancy in the code.
A better pattern for form submission is to submit forms to the same action that generated them, in our example the "first". The "first" action should receive the variables, process them, store them server-side, and redirect the visitor to the "second" page, which retrieves the variables. This mechanism is called a postback.

Modify the default controller to implement self-submission:
def first():
    if request.vars.visitor_name:
        session.visitor_name = request.vars.visitor_name
        redirect(URL('second'))
    return dict()

def second():
    return dict()
Then modify the "default/first.html" view:
{{extend 'layout.html'}}
What is your name?
<form>
  <input name="visitor_name" />
  <input type="submit" />
</form>
and the "default/second.html" view needs to retrieve the data from the session instead of from the request.vars:
{{extend 'layout.html'}}
<h1>Hello {{=session.visitor_name or "anonymous"}}</h1>
From the point of view of the visitor, the self-submission behaves exactly the same as the previous implementation. We have not added validation yet, but it is now clear that validation should be performed by the first action.
This approach is better also because the name of the visitor stays in the session, and can be accessed by all actions and views in the application without having to be passed around explicitly.
Note that if the "second" action is ever called before a visitor name is set, it will display "Hello anonymous" because session.visitor_name returns None. Alternatively we could have added the following code in the controller (inside the second function):
if request.function != 'first' and not session.visitor_name:
    redirect(URL('first'))
This is an ad hoc mechanism that you can use to enforce authorization on controllers, though see Chapter 9 for a more powerful method.
With web2py we can move one step further and ask web2py to generate the form for us, including validation. web2py provides helpers (FORM, INPUT, TEXTAREA, and SELECT/OPTION) with the same names as the equivalent HTML tags. They can be used to build forms either in the controller or in the view.
For example, here is one possible way to rewrite the first action:
def first():
    form = FORM(INPUT(_name='visitor_name', requires=IS_NOT_EMPTY()),
                INPUT(_type='submit'))
    if form.process().accepted:
        session.visitor_name = form.vars.visitor_name
        redirect(URL('second'))
    return dict(form=form)
where we are saying that the FORM tag contains two INPUT tags. The attributes of the input tags are specified by the named arguments starting with underscore. The requires argument is not a tag attribute (because it does not start by underscore) but it sets a validator for the value of visitor_name.
Here is yet another better way to create the same form:
def first():
    form = SQLFORM.factory(Field('visitor_name',
                                 label='what is your name?',
                                 requires=IS_NOT_EMPTY()))
    if form.process().accepted:
        session.visitor_name = form.vars.visitor_name
        redirect(URL('second'))
    return dict(form=form)
The form object can be easily serialized in HTML by embedding it in the "default/first.html" view.
{{extend 'layout.html'}}
{{=form}}
The form.process() method applies the validators and returns the form itself. The form.accepted variable is set to True if the form was processed and passed validation. If the self-submitted form passes validation, it stores the variables in the session and redirects as before. If the form does not pass validation, error messages are inserted into the form and shown to the user, as below:

In the next section we will show how forms can be generated automatically from a model.
In all our examples we have used the session to pass the user name from the first action to the second. We could have used a different mechanism and passed data as part of a redirect URL:
def first():
    form = SQLFORM.factory(Field('visitor_name', requires=IS_NOT_EMPTY()))
    if form.process().accepted:
        name = form.vars.visitor_name
        redirect(URL('second', vars=dict(name=name)))
    return dict(form=form)

def second():
    name = request.vars.name or redirect(URL('first'))
    return dict(name=name)
Then modify the "default/second.html" view:
{{extend 'layout.html'}}
<h1>Hello {{=name}}</h1>
Mind that in general it is not a good idea to pass data from one action to another using the URL. It makes it harder to secure the application. It is safer to store the data in a session.
Internationalization
Your code is likely to include hardcoded strings such as "What is your name?". You should be able to customize strings without editing the code and in particular insert translations for these strings in different languages. In this way if a visitor has the language preference of the browser set to "Italian", web2py will use the Italian translation for the strings, if available. This feature of web2py is called "internationalization" and it is described in more detail in the next chapter.
Here we just observe that in order to use this feature you should markup strings that needs translation. This is done by wrapping a quoted string in code such as
"What is your name?"
with the T operator:
T("What is your name?")
You can also mark for translations strings hardcoded in views. For example
<h1>What is your name?</h1>
becomes
<h1>{{=T("What is your name?")}}</h1>
It is good practice to do this for every string in the code (field labels, flash messages, etc.) except for tables and field names.
Once the strings are identified and marked up, web2py takes care of almost everything else. The admin interface also provides a page where you can translate each string in the languages you desire to support.
web2py includes a powerful pluralization engine which is described in the next chapter. It is integrated with both the internationalization engine and the markmin renderer.
An image blog
Here, as another example, we wish to create a web application that allows the administrator to post images and give them a name, and allows the visitors of the web site to view the named images and submit comments (posts).
As before, from the site page in admin, create a new application called images, and navigate to the edit page:

We start by creating a model, a representation of the persistent data in the application (the images to upload, their names, and the comments). First, you need to create/edit a model file which, for lack of imagination, we call "db.py". We assume the code below will replace any existing code in "db.py". Models and controllers must have a .py extension since they are Python code. If the extension is not provided, it is appended by web2py. Views instead have a .html extension since they mainly contain HTML code.
Remove the model "menu.py".
Edit the "db.py" file by clicking the corresponding "edit" button:
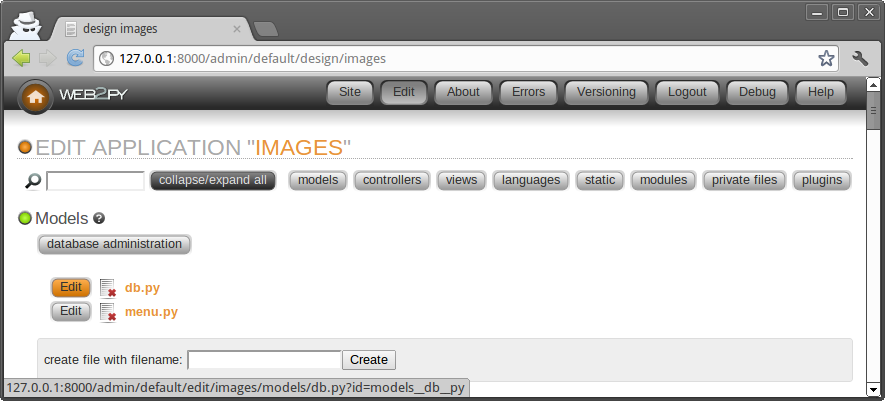
and enter the following:
1 2 3 4 5 6 7 8 9 10 11 12 13 14 15 16 17 18 19 20 | db = DAL("sqlite://storage.sqlite")
db.define_table('image',
Field('title', unique=True),
Field('file', 'upload'),
format = '%(title)s')
db.define_table('post',
Field('image_id', 'reference image'),
Field('author'),
Field('email'),
Field('body', 'text'))
db.image.title.requires = IS_NOT_IN_DB(db, db.image.title)
db.post.image_id.requires = IS_IN_DB(db, db.image.id, '%(title)s')
db.post.author.requires = IS_NOT_EMPTY()
db.post.email.requires = IS_EMAIL()
db.post.body.requires = IS_NOT_EMPTY()
db.post.image_id.writable = db.post.image_id.readable = False
|
Let's analyze this line by line.
Line 1 defines a global variable called db that represents the database connection. In this case it is a connection to a SQLite database stored in the file "applications/images/databases/storage.sqlite". When using SQLite, if the database file does not exist, it is created. You can change the name of the file, as well as the name of the global variable db, but it is convenient to give them the same name, to make it easy to remember.
Lines 3-6 define a table "image". define_table is a method of the db object. The first argument, "image", is the name of the table we are defining. The other arguments are the fields belonging to that table. This table has a field called "title", a field called "file", and a field called "id" that serves as the table primary key ("id" is not explicitly declared because all tables have an id field by default). The field "title" is a string, and the field "file" is of type "upload". "upload" is a special type of field used by the web2py Data Abstraction Layer (DAL) to store the names of uploaded files. web2py knows how to upload files (via streaming if they are large), rename them safely, and store them.
When a table is defined, web2py takes one of several possible actions:
- if the table does not exist, the table is created;
- if the table exists and does not correspond to the definition, the table is altered accordingly, and if a field has a different type, web2py tries to convert its contents;
- if the table exists and corresponds to the definition, web2py does nothing.
This behavior is called "migration". In web2py migrations are automatic, but can be disabled for each table by passing migrate=False as the last argument of define_table.
Line 6 defines a format string for the table. It determines how a record should be represented as a string. Notice that the format argument can also be a function that takes a record and returns a string. For example:
format=lambda row: row.title
Lines 8-12 define another table called "post". A post has an "author", an "email" (we intend to store the email address of the author of the post), a "body" of type "text" (we intend to use it to store the actual comment posted by the author), and an "image_id" field of type reference that points to db.image via the "id" field.
In line 14, db.image.title represents the field "title" of table "image". The attribute requires allows you to set requirements/constraints that will be enforced by web2py forms. Here we require that the "title" is unique:
IS_NOT_IN_DB(db, db.image.title)
Notice this is optional because it is set automatically given that Field('title', unique=True).
The objects representing these constraints are called validators. Multiple validators can be grouped in a list. Validators are executed in the order they appear. IS_NOT_IN_DB(a, b) is a special validator that checks that the value of a field b for a new record is not already in a.
Line 15 requires that the field "image_id" of table "post" is in db.image.id. As far as the database is concerned, we had already declared this when we defined the table "post". Now we are explicitly telling the model that this condition should be enforced by web2py, too, at the form processing level when a new comment is posted, so that invalid values do not propagate from input forms to the database. We also require that the "image_id" be represented by the "title", '%(title)s', of the corresponding record.
Line 20 indicates that the field "image_id" of table "post" should not be shown in forms, writable=False and not even in read-only forms, readable=False.
The meaning of the validators in lines 17-18 should be obvious.
Notice that the validator
db.post.image_id.requires = IS_IN_DB(db, db.image.id, '%(title)s')
can be omitted (and would be automatic) if we specify a format for referenced table:
db.define_table('image', ..., format='%(title)s')
where the format can be a string or a function that takes a record and returns a string.
Once a model is defined, if there are no errors, web2py creates an application administration interface to manage the database. You access it via the "database administration" link in the edit page or directly:
http://127.0.0.1:8000/images/appadmin
Here is a screenshot of the appadmin interface:

This interface is coded in the controller called "appadmin.py" and the corresponding view "appadmin.html". From now on, we will refer to this interface simply as appadmin. It allows the administrator to insert new database records, edit and delete existing records, browse tables, and perform database joins.
The first time appadmin is accessed, the model is executed and the tables are created. The web2py DAL translates Python code into SQL statements that are specific to the selected database back-end (SQLite in this example). You can see the generated SQL from the edit page by clicking on the "sql.log" link under "models". Notice that the link is not present until the tables have been created.

If you were to edit the model and access appadmin again, web2py would generate SQL to alter the existing tables. The generated SQL is logged into "sql.log".
Now go back to appadmin and try to insert a new image record:
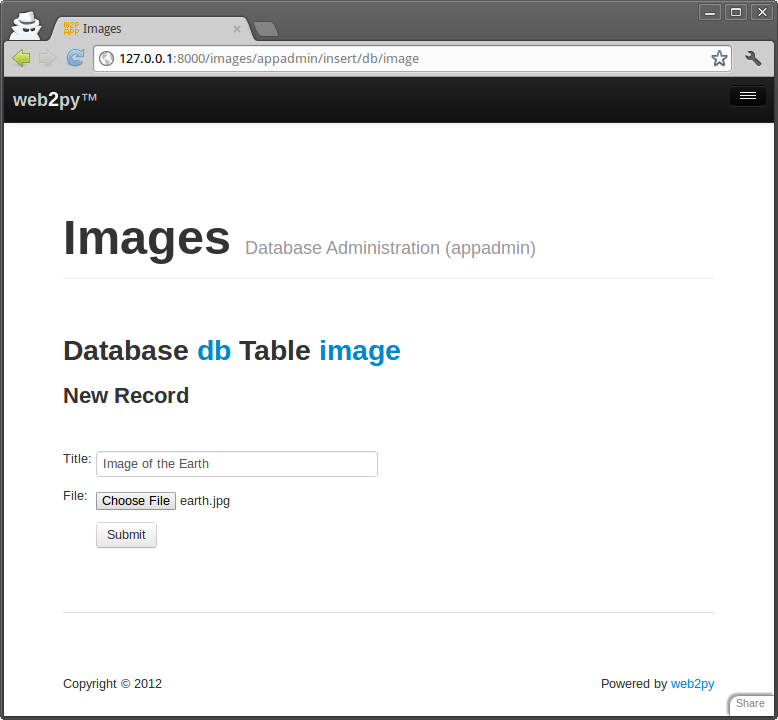
web2py has translated the db.image.file "upload" field into an upload form for the file. When the form is submitted and an image file is uploaded, the file is renamed in a secure way that preserves the extension, it is saved with the new name under the application "uploads" folder, and the new name is stored in the db.image.file field. This process is designed to prevent directory traversal attacks.
Notice that each field type is rendered by a widget. Default widgets can be overridden.
When you click on a table name in appadmin, web2py performs a select of all records on the current table, identified by the DAL query
db.image.id > 0
and renders the result.

You can select a different set of records by editing the DAL query and pressing [Submit].
To edit or delete a single record, click on the record id number.
Because of the IS_IN_DB validator, the reference field "image_id" is rendered by a drop-down menu. The items in the drop-down are stored as keys (db.image.id), but are represented by their db.image.title, as specified by the validator.
Validators are powerful objects that know how to represent fields, filter field values, generate errors, and format values extracted from the field.
The following figure shows what happens when you submit a form that does not pass validation:

The same forms that are automatically generated by appadmin can also be generated programmatically via the SQLFORM helper and embedded in user applications. These forms are CSS-friendly, and can be customized.
Every application has its own appadmin; therefore, appadmin itself can be modified without affecting other applications.
So far, the application knows how to store data, and we have seen how to access the database via appadmin. Access to appadmin is restricted to the administrator, and it is not intended as a production web interface for the application; hence the next part of this walk-through. Specifically we want to create:
- An "index" page that lists all available images sorted by title and links to detail pages for the images.
- A "show/[id]" page that shows the visitor the requested image and allows the visitor to view and post comments.
- A "download/[name]" action to download uploaded images.
This is represented schematically here:

Go back to the edit page and edit the "default.py" controller, replacing its contents with the following:
def index():
    images = db().select(db.image.ALL, orderby=db.image.title)
    return dict(images=images)
This action returns a dictionary. The keys of the items in the dictionary are interpreted as variables passed to the view associated to the action. When developing, if there is no view, the action is rendered by the "generic.html" view that is provided with every web2py application.
The index action performs a select of all fields (db.image.ALL) from table image, ordered by db.image.title. The result of the select is a Rows object containing the records. Assign it to a local variable called images returned by the action to the view. images is iterable and its elements are the selected rows. For each row the columns can be accessed as dictionaries: images[0]['title'] or equivalently as images[0].title.
If you do not write a view, the dictionary is rendered by "views/generic.html" and a call to the index action would look like this:

You have not created a view for this action yet, so web2py renders the set of records in plain tabular form.
Proceed to create a view for the index action. Return to admin, edit "default/index.html" and replace its content with the following:
1 2 3 4 5 6 7 | {{extend 'layout.html'}}
<h1>Current Images</h1>
<ul>
{{for image in images:}}
{{=LI(A(image.title, _href=URL("show", args=image.id)))}}
{{pass}}
</ul>
|
The first thing to notice is that a view is pure HTML with special {{...}} tags. The code embedded in {{...}} is pure Python code with one caveat: indentation is irrelevant. Blocks of code start with lines ending in colon (:) and end in lines beginning with the keyword pass. In some cases the end of a block is obvious from context and the use of pass is not required.
Lines 5-7 loop over the image rows and for each row image display:
LI(A(image.title, _href=URL('show', args=image.id))
This is a <li>...</li> tag that contains an <a href="...">...</a> tag which contains the image.title. The value of the hypertext reference (href attribute) is:
URL('show', args=image.id)
i.e., the URL within the same application and controller as the current request that calls the function called "show", passing a single argument to the function, args=image.id. LI, A, etc. are web2py helpers that map to the corresponding HTML tags. Their unnamed arguments are interpreted as objects to be serialized and inserted in the tag's innerHTML. Named arguments starting with an underscore (for example _href) are interpreted as tag attributes but without the underscore. For example _href is the href attribute, _class is the class attribute, etc.
As an example, the following statement:
{{=LI(A('something', _href=URL('show', args=123))}}
is rendered as:
<li><a href="/images/default/show/123">something</a></li>
A handful of helpers (INPUT, TEXTAREA, OPTION and SELECT) also support some special named attributes not starting with underscore (value, and requires). They are important for building custom forms and will be discussed later.
Go back to the edit page. It now indicates that "default.py exposes index". By clicking on "index", you can visit the newly created page:
http://127.0.0.1:8000/images/default/index
which looks like:

If you click on the image name link, you are directed to:
http://127.0.0.1:8000/images/default/show/1
and this results in an error, since you have not yet created an action called "show" in controller "default.py".
Let's edit the "default.py" controller and replace its content with:
def index():
    images = db().select(db.image.ALL, orderby=db.image.title)
    return dict(images=images)

def show():
    image = db.image(request.args(0, cast=int)) or redirect(URL('index'))
    db.post.image_id.default = image.id
    form = SQLFORM(db.post)
    if form.process().accepted:
        response.flash = 'your comment is posted'
    comments = db(db.post.image_id == image.id).select(orderby=db.post.id)
    return dict(image=image, comments=comments, form=form)

def download():
    return response.download(request, db)
The controller contains two new actions: "show" and "download". The "show" action selects the image with the id parsed from the request args and all comments related to the image. "show" then passes everything to the view "default/show.html".
The image id referenced by:
URL('show', args=image.id)
in "default/index.html", can be accessed as:
request.args(0, cast=int)from the "show" action. The cast=int argument is optional but very important. It attempts to cast the string value passed in the PATH_INFO into an int. On failure it raises a proper exception instead of causing a ticket. One can also specify a redirect in case of failure to cast:
request.args(0, cast=int, otherwise=URL('error'))Moreover db.image(...) is a shortcut for
db(db.image.id == ...).select().first()
The "download" action expects a filename in request.args(0), builds a path to the location where that file is supposed to be, and sends it back to the client. If the file is too large, it streams the file without incurring any memory overhead.
Notice the following statements:
- Line 7 sets the value for the reference field, which is not part of the input form because of the
db.posttable model. - Line 8 creates an insert form SQLFORM for the
db.posttable. - Line 9 processes the submitted form (the submitted form variables are in
request.vars) within the current session (the session is used to prevent double submissions, and to enforce navigation). If the submitted form variables are validated, the new comment is inserted in thedb.posttable; otherwise the form is modified to include error messages (for example, if the author's email address is invalid). This is all done in line 9!. - Line 10 is only executed if the form is accepted, after the record is inserted into the database table.
response.flashis a web2py variable that is displayed in the views and used to notify the visitor that something happened. - Line 11 selects all comments that reference the current image, the
.select(orderby=db.post.id)keeps comments history sorted.
The "download" action is already defined in the "default.py" controller of the scaffolding application.
The "download" action does not return a dictionary, so it does not need a view. The "show" action, though, should have a view, so return to admin and create a new view called "default/show.html".
Edit this new file and replace its content with the following:
{{extend 'layout.html'}}
<h1>Image: {{=image.title}}</h1>
<div style="text-align:center">
<img width="200px"
     src="{{=URL('download', args=image.file)}}" />
</div>
{{if len(comments):}}
  <h2>Comments</h2><br /><p>
  {{for post in comments:}}
    <p>{{=post.author}} says <i>{{=post.body}}</i></p>
  {{pass}}</p>
{{else:}}
  <h2>No comments posted yet</h2>
{{pass}}
<h2>Post a comment</h2>
{{=form}}
This view displays the image.file by calling the "download" action inside an <img ... /> tag. If there are comments, it loops over them and displays each one.
Here is how everything will appear to a visitor.

When a visitor submits a comment via this page, the comment is stored in the database and appended at the bottom of the page.
Adding authentication
The web2py API for Role-Based Access Control is quite sophisticated, but for now we will limit ourselves to restricting access to the show action to authenticated users, deferring a more detailed discussion to Chapter 9.
To limit access to authenticated users, we need to complete three steps. In a model, for example "db.py", we need to add:
from gluon.tools import Auth
auth = Auth(db)
auth.define_tables(username=True)
In our controller, we need to add one action:
def user():
    return dict(form=auth())
This is sufficient to enable login, register, logout, etc. pages. The default layout will also show options to the corresponding pages in the top right corner.

We can now decorate the functions that we want to restrict, for example:
@auth.requires_login()
def show():
    ...
Any attempt to access
http://127.0.0.1:8000/images/default/show/[image_id]
will require login. If the user is not logged it, the user will be redirected to
http://127.0.0.1:8000/images/default/user/login

The user function also exposes, among others, the following actions:
http://127.0.0.1:8000/images/default/user/logout
http://127.0.0.1:8000/images/default/user/register
http://127.0.0.1:8000/images/default/user/profile
http://127.0.0.1:8000/images/default/user/change_password
http://127.0.0.1:8000/images/default/user/request_reset_password
http://127.0.0.1:8000/images/default/user/retrieve_username
http://127.0.0.1:8000/images/default/user/retrieve_password
http://127.0.0.1:8000/images/default/user/verify_email
http://127.0.0.1:8000/images/default/user/impersonate
http://127.0.0.1:8000/images/default/user/not_authorized
Now, a first-time user needs to register in order to be able to log in and read or post comments.
Both the
authobject and theuserfunction are already defined in the scaffolding application. Theauthobject is highly customizable and can deal with email verification, registration approvals, CAPTCHA, and alternate login methods via plugins.
Adding grids
We can improve this further using the SQLFORM.grid and SQLFORM.smartgrid gadgets to create a management interface for our application:
@auth.requires_membership('manager')
def manage():
    grid = SQLFORM.smartgrid(db.image, linked_tables=['post'])
    return dict(grid=grid)
with associated "views/default/manage.html"
{{extend 'layout.html'}}
<h2>Management Interface</h2>
{{=grid}}
Using appadmin create a group "manager" and make some users members of the group. They will be able to access
http://127.0.0.1:8000/images/default/manage
and browse, search:

create, update and delete images and their comments:

Configuring the layout
You can configure the default layout by editing "views/layout.html" but you can also configure it without editing the HTML. In fact, the "static/css/web2py.css" stylesheet is well documented and described in Chapter 5. You can change color, columns, size, borders and background without editing the HTML. If you want to edit the menu, the title or the subtitle, you can do so in any model file. The scaffolding app, sets default values of these parameters in the file "models/menu.py":
response.title = request.application
response.subtitle = 'customize me!'
response.meta.author = 'you'
response.meta.description = 'describe your app'
response.meta.keywords = 'bla bla bla'
response.menu = [ [ 'Index', False, URL('index') ] ]
A simple wiki
In this section, we build a simple wiki from scratch using only low level APIs (as opposed to using the built-in wiki capabilities of web2py demonstrated in the next section). The visitor will be able to create pages, search them (by title), and edit them. The visitor will also be able to post comments (exactly as in the previous applications), and also post documents (as attachments to the pages) and link them from the pages. As a convention, we adopt the Markmin syntax for our wiki syntax. We will also implement a search page with Ajax, an RSS feed for the pages, and a handler to search the pages via XML-RPC[xmlrpc] . The following diagram lists the actions that we need to implement and the links we intend to build among them.

Start by creating a new scaffolding app, naming it "mywiki".
The model must contain three tables: page, comment, and document. Both comment and document reference page because they belong to page. A document contains a file field of type upload as in the previous images application.
Here is the complete model:
db = DAL('sqlite://storage.sqlite')

from gluon.tools import *
auth = Auth(db)
auth.define_tables()
crud = Crud(db)

db.define_table('page',
                Field('title'),
                Field('body', 'text'),
                Field('created_on', 'datetime', default=request.now),
                Field('created_by', 'reference auth_user', default=auth.user_id),
                format='%(title)s')

db.define_table('post',
                Field('page_id', 'reference page'),
                Field('body', 'text'),
                Field('created_on', 'datetime', default=request.now),
                Field('created_by', 'reference auth_user', default=auth.user_id))

db.define_table('document',
                Field('page_id', 'reference page'),
                Field('name'),
                Field('file', 'upload'),
                Field('created_on', 'datetime', default=request.now),
                Field('created_by', 'reference auth_user', default=auth.user_id),
                format='%(name)s')

db.page.title.requires = IS_NOT_IN_DB(db, 'page.title')
db.page.body.requires = IS_NOT_EMPTY()
db.page.created_by.readable = db.page.created_by.writable = False
db.page.created_on.readable = db.page.created_on.writable = False

db.post.body.requires = IS_NOT_EMPTY()
db.post.page_id.readable = db.post.page_id.writable = False
db.post.created_by.readable = db.post.created_by.writable = False
db.post.created_on.readable = db.post.created_on.writable = False

db.document.name.requires = IS_NOT_IN_DB(db, 'document.name')
db.document.page_id.readable = db.document.page_id.writable = False
db.document.created_by.readable = db.document.created_by.writable = False
db.document.created_on.readable = db.document.created_on.writable = False
Edit the controller "default.py" and create the following actions:
- index: list all wiki pages
- create: add a new wiki page
- show: show a wiki page and its comments, and add new comments
- edit: edit an existing page
- documents: manage the documents attached to a page
- download: download a document (as in the images example)
- search: display a search box and, via an Ajax callback, return all matching titles as the visitor types
- callback: the Ajax callback function. It returns the HTML that gets embedded in the search page while the visitor types.
Here is the "default.py" controller:
1 2 3 4 5 6 7 8 9 10 11 12 13 14 15 16 17 18 19 20 21 22 23 24 25 26 27 28 29 30 31 32 33 34 35 36 37 38 39 40 41 42 43 44 45 46 47 48 49 50 51 52 53 54 55 56 57 58 59 | def index():
""" this controller returns a dictionary rendered by the view
it lists all wiki pages
>>> index().has_key('pages')
True
"""
pages = db().select(db.page.id, db.page.title, orderby=db.page.title)
return dict(pages=pages)
@auth.requires_login()
def create():
"""creates a new empty wiki page"""
form = SQLFORM(db.page).process(next=URL('index'))
return dict(form=form)
def show():
"""shows a wiki page"""
this_page = db.page(request.args(0, cast=int)) or redirect(URL('index'))
db.post.page_id.default = this_page.id
form = SQLFORM(db.post).process() if auth.user else None
pagecomments = db(db.post.page_id == this_page.id).select(orderby=db.post.id)
return dict(page=this_page, comments=pagecomments, form=form)
@auth.requires_login()
def edit():
"""edit an existing wiki page"""
this_page = db.page(request.args(0, cast=int)) or redirect(URL('index'))
form = SQLFORM(db.page, this_page).process(
next = URL('show', args=request.args))
return dict(form=form)
@auth.requires_login()
def documents():
"""browser, edit all documents attached to a certain page"""
page = db.page(request.args(0, cast=int)) or redirect(URL('index'))
db.document.page_id.default = page.id
grid = SQLFORM.grid(db.document.page_id == page.id, args=[page.id])
return dict(page=page, grid=grid)
def user():
return dict(form=auth())
def download():
"""allows downloading of documents"""
return response.download(request, db)
def search():
"""an ajax wiki search page"""
return dict(form=FORM(INPUT(_id='keyword',
_name='keyword',
_onkeyup="ajax('callback', ['keyword'], 'target');")),
target_div=DIV(_id='target'))
def callback():
"""an ajax callback that returns a <ul> of links to wiki pages"""
query = db.page.title.contains(request.vars.keyword)
pages = db(query).select(orderby=db.page.title)
links = [A(p.title, _href=URL('show', args=p.id)) for p in pages]
return UL(*links)
|
Lines 2-6 constitute a comment for the index action. Lines 4-5 inside the comment are interpreted by python as test code (doctest). Tests can be run via the admin interface. In this case the tests verify that the index action runs without errors.
Lines 18, 27, and 35 try to fetch a page record with the id in request.args(0).
Lines 13, 20 define and process create forms for a new page and a new comment and
Line 28 defines and processes an update form for a wiki page.
Line 37 creates a grid object that allows to view, add and update the comments linked to a page.
Some magic happens in line 51. The onkeyup attribute of the INPUT tag "keyword" is set. Every time the visitor releases a key, the JavaScript code inside the onkeyup attribute is executed, client-side. Here is the JavaScript code:
ajax('callback', ['keyword'], 'target');
ajax is a JavaScript function defined in the file "web2py.js" which is included by the default "layout.html". It takes three parameters: the URL of the action that performs the synchronous callback, a list of the IDs of variables to be sent to the callback (["keyword"]), and the ID where the response has to be inserted ("target").
As soon as you type something in the search box and release a key, the client calls the server and sends the content of the 'keyword' field, and, when the server responds, the response is embedded in the page itself as the innerHTML of the 'target' tag.
The 'target' tag is a DIV defined in line 52. It could have been defined in the view as well.
Here is the code for the view "default/create.html":
{{extend 'layout.html'}}
<h1>Create new wiki page</h1>
{{=form}}
Assuming you are registered and logged in, if you visit the create page, you see the following:

Here is the code for the view "default/index.html":
{{extend 'layout.html'}}
<h1>Available wiki pages</h1>
[ {{=A('search', _href=URL('search'))}} ]<br />
<ul>{{for page in pages:}}
     {{=LI(A(page.title, _href=URL('show', args=page.id)))}}
{{pass}}</ul>
[ {{=A('create page', _href=URL('create'))}} ]
It generates the following page:

Here is the code for the view "default/show.html":
{{extend 'layout.html'}}
<h1>{{=page.title}}</h1>
[ {{=A('edit', _href=URL('edit', args=request.args))}} ]<br />
{{=MARKMIN(page.body)}}
<h2>Comments</h2>
{{for post in comments:}}
  <p>{{=db.auth_user[post.created_by].first_name}} on {{=post.created_on}}
     says <i>{{=post.body}}</i></p>
{{pass}}
<h2>Post a comment</h2>
{{=form}}
If you wish to use markdown syntax instead of markmin syntax:
from gluon.contrib.markdown import WIKI as MARKDOWN
and use MARKDOWN instead of the MARKMIN helper. Alternatively, you can choose to accept raw HTML instead of markmin syntax. In this case you would replace:
{{=MARKMIN(page.body)}}
with:
{{=XML(page.body)}}
(so that the XML does not get escaped, which web2py normally does by default for security reasons).
This can be done better with:
{{=XML(page.body, sanitize=True)}}
By setting sanitize=True, you tell web2py to escape unsafe XML tags such as "<script>", and thus prevent XSS vulnerabilities.
Now if, from the index page, you click on a page title, you can see the page that you have created:

Here is the code for the view "default/edit.html":
{{extend 'layout.html'}}
<h1>Edit wiki page</h1>
[ {{=A('show', _href=URL('show', args=request.args))}}
| {{=A('documents', _href=URL('documents', args=request.args))}} ]<br />
{{=form}}
It generates a page that looks almost identical to the create page.
Here is the code for the view "default/documents.html":
{{extend 'layout.html'}}
<h1>Documents for page: {{=page.title}}</h1>
[ {{=A('show', _href=URL('show', args=request.args))}} ]<br />
<h2>Documents</h2>
{{=grid}}
If, from the "show" page, you click on documents, you can now manage the documents attached to the page.

Finally here is the code for the view "default/search.html":
{{extend 'layout.html'}}
<h1>Search wiki pages</h1>
[ {{=A('listall', _href=URL('index'))}}]<br />
{{=form}}<br />{{=target_div}}
which generates the following Ajax search form:

You can also try to call the callback action directly by visiting, for example, the following URL:
http://127.0.0.1:8000/mywiki/default/callback?keyword=main
If you look at the page source you see the HTML returned by the callback:
<ul><li><a href="/mywiki/default/show/4">My Main Page</a></li></ul>
Generating an RSS feed of your wiki pages using web2py is easy because web2py includes gluon.contrib.rss2. Just append the following action to the default controller:
def news():
    """generates rss feed from the wiki pages"""
    response.generic_patterns = ['.rss']
    pages = db().select(db.page.ALL, orderby=db.page.title)
    return dict(title='mywiki rss feed',
                link='http://127.0.0.1:8000/mywiki/default/index',
                description='mywiki news',
                created_on=request.now,
                items=[dict(title=row.title,
                            link=URL('show', args=row.id, scheme=True, host=True, extension=False),
                            description=MARKMIN(row.body).xml(),
                            created_on=row.created_on) for row in pages])
and when you visit the page
http://127.0.0.1:8000/mywiki/default/news.rss
you see the feed (the exact output depends on the feed reader). Notice that the dict is automatically converted to RSS, thanks to the .rss extension in the URL.

web2py also includes feedparser to read third-party feeds.
Notice that the line:
response.generic_patterns = ['.rss']
instructs web2py to use generic views (in our case "views/generic.rss") when the URL ends in the glob pattern ".rss". By default generic views are only allowed from localhost for development purposes.
Finally, let's add an XML-RPC handler that allows searching the wiki programmatically:
service = Service()

@service.xmlrpc
def find_by(keyword):
    """finds pages that contain keyword for XML-RPC"""
    return db(db.page.title.contains(keyword)).select().as_list()

def call():
    """exposes all registered services, including XML-RPC"""
    return service()
Here, the handler action simply publishes (via XML-RPC), the functions decorated by @ervice.xmlrpc. In this case, find_by. find_by is not an action (because it takes an argument). It queries the database with .select() and then extracts the records as a list with .as_list() and returns the list.
Here is an example of how to access the XML-RPC handler from an external Python program.
import xmlrpclib
server = xmlrpclib.ServerProxy('http://127.0.0.1:8000/mywiki/default/call/xmlrpc')
for item in server.find_by('main'):
    print item['created_on'], item['title']
The handler can be accessed from many other programming languages that understand XML-RPC, including C, C++, C# and Java.
On date, datetime and time format
There are three different representations for each of the field types date, datetime and time:
- the database representation
- the internal web2py representation
- the string representation in forms and tables
The database representation is an internal issue and does not affect the code. Internally, at the web2py level, they are stored as datetime.date, datetime.datetime and datetime.time object respectively and they can be manipulated as such:
for page in db(db.page).select():
    print page.title, page.created_on.day, page.created_on.month, page.created_on.year
When dates are converted to strings in forms they are converted using the ISO representation
%Y-%m-%d %H:%M:%S
yet this representation is internationalized and you can use the admin translation page to change the format to an alternate one. For example:
%m/%d/%Y %H:%M:%S
Mind that by default English is not translated because web2py assumes the applications are written in English. If you want internationalization to work for English you need to create the translation file (using admin) and you need to declare that the application's current language is something other than english, for example:
T.current_languages = ['null']
The built-in web2py wiki
Now you can forget the code we have built-in the previous section (not what you have learned about web2py APIs, just the code of the specific example) as we are going to provide an example of the built-in web2py wiki.
In fact, web2py comes with wiki capabilities including media attachments, tags, tag cloud, page permissions, and support for oembed [oembed] and components (chapter 14). This wiki can be used with any web2py application.
Notice the API of the built-in wiki is still considered experimental and small changes are still possible.
Here we assume we are starting from scratch from a simple clone of the "welcome" application called "wikidemo". If not, make sure that in db.py migrations are enabled else the new required wiki tables will not be automatically created.
Edit the controller and replace the "index" action with.
def index(): return auth.wiki()
Done! You have a fully working wiki. Please note that wiki needs some tables to be defined, and they'll only be defined when accessing the controller. If you want them to be readily available, use auth.wiki(resolve=False), and make sure table migrations are turned on: more on that on the Extending-the-auth-wiki-feature section following.
At this point no page has been created and in order to create pages you must be logged-in and you must be member of a group called "wiki_editor" or "wiki_author". If you are logged-in as administrator the "wiki_editor" group is created automatically and you are made a member. The difference between editors and authors is that the editors can create pages, edit and delete any page, while the authors can create pages (with some optional restrictions) and can only edit/delete the pages they have created.
The auth.wiki() function returns in a dictionary with a key content which is understood by the scaffolding "views/default/index.html". You can make your own view for this action:
{{extend 'layout.html'}}
{{=content}}
and add extra HTML or code as needed. You do not have to use the "index" action to expose the wiki. You can use an action with a different name.
To try the wiki, simply login into admin, visit the page
http://127.0.0.1:8000/wikidemo/default/index
Then choose a slug (in the publishing business, a slug is a short name given to an article that is in production) and you will be redirected to an empty page where you can edit the content using MARKMIN wiki syntax. A new menu item called "[wiki]" will allow you to create, search, and edit pages. Wiki pages have URLs like:
http://127.0.0.1:8000/wikidemo/default/index/[slug]
Service pages have names which start by underscore:
http://127.0.0.1:8000/wikidemo/default/index/_create
http://127.0.0.1:8000/wikidemo/default/index/_search
http://127.0.0.1:8000/wikidemo/default/index/_could
http://127.0.0.1:8000/wikidemo/default/index/_recent
http://127.0.0.1:8000/wikidemo/default/index/_edit/...
http://127.0.0.1:8000/wikidemo/default/index/_editmedia/...
http://127.0.0.1:8000/wikidemo/default/index/_preview/...
Try to create more pages such as "index", "aboutus", and "contactus". Try to edit them.
The wiki method has the following signature:
def wiki(self, slug=None, env=None, render='markmin',
         manage_permissions=False, force_prefix='',
         restrict_search=False, resolve=True,
         extra=None, menu_groups=None)
It takes the following arguments:
renderwhich defaults to'markmin'but can be set equal to'html'. It determines the syntax of the wiki. We will discuss the markmin wiki markup later. If you change it to HTML you can use a wysiwyg javascript editor such as TinyMCE or NicEdit.manage_permissions. This is set toFalseby default and only recognizes permissions for "wiki_editor" and "wiki_author". If you change it toTruethe create/edit page will give the option to specify by name the group(s) whose members have permission to read and edit the page. There is a group "everybody" which includes all users.force_prefix. If set to something like'%(id)s-'it will restrict authors (not editors) to creating pages with a prefix like "[user id]-[page name]". The prefix can contain the id ("%(id)s") or the username ("%(username)s") or any other field from the auth_user table, as long as the corresponding column contains a valid string that would pass URL validation.restrict_search. This defaults toFalseand any logged-in user can search all wiki pages (but not necessary read or edit them). If set toTrue, authors can search only their own pages, editors can search everything, other users cannot search anything.menu_groups. This defaults toNoneand it indicates that wiki management menu (search, create, edit, etc.) is always displayed. You can set it to a list of group names whose members only can see this menu, for example['wiki_editor','wiki_author']. Notice that even if the menu is exposed to everybody that does not mean everybody is allowed to perform actions listed in the menu since they are regulated by the access control system.
The wiki method has some additional parameters which will be explained later: slug, env, and extra.
MARKMIN basics
The MARKMIN syntax allows you to markup bold text using **bold**, italic text with ''italic'', and code text should be delimited by double inverted quotes. Titles must be prefixed by a #, sections by ##, and sub-sections by ###. Use a minus (-) to prefix an un-ordered item and plus (+) to prefix an ordered item. URLs are automatically converted into links. Here is an example of markmin text:
# This is a title
## this is a section title
### this is a subsection title

Text can be **bold**, ''italic'', ``code`` etc.
Learn more at:

http://web2py.com
You can use the extra parameter of auth.wiki to pass extra rendering rules to the MARKMIN helper.
You can find more information about the MARKMIN syntax in chapter 5.
auth.wiki is more powerful than the barebones MARKMIN helpers, supporting oembed and components.
You can use the env parameter of auth.wiki to expose functions to your wiki. For example:
auth.wiki(env=dict(join=lambda a:"-".join(a.split(","))))
allows you to use the markup syntax:
@{join:1,2,3}
This calls the join function passed to env with argument "1,2,3" and will be rendered as 1-2-3.
Oembed protocol
You can type in (or cut-and-paste) any URL into a wiki page and it is rendered as a link to the URL. There are exceptions:
- If the URL has an image extension, the link is embedded as an image,
<img/>. - If the URL has an audio extension, the link is embedded as HTML5 audio
<audio/>. - If the URL has a video extension, the link is embedded as HTML5 video
<video/>. - If the URL has a MS Office or PDF extension, Google Doc Viewer is embedded, showing the content of the document (only works for public documents).
- If the URL points to a YouTube page, a Vimeo page, or a Flickr page, web2py contacts the corresponding web service and queries it about the proper way to embed the content. This is done using the
oembedprotocol.
Here is a complete list of supported formats:
Image (.PNG, .GIF, .JPG, .JPEG)
Audio (.WAV, .OGG, .MP3)
Video (.MOV, .MPE, .MP4, .MPG, .MPG2, .MPEG, .MPEG4, .MOVIE)
Supported via Google Doc Viewer:
Microsoft Excel (.XLS and .XLSX)
Microsoft PowerPoint 2007 / 2010 (.PPTX)
Apple Pages (.PAGES)
Adobe PDF (.PDF)
Adobe Illustrator (.AI)
Adobe Photoshop (.PSD)
Autodesk AutoCad (.DXF)
Scalable Vector Graphics (.SVG)
PostScript (.EPS, .PS)
TrueType (.TTF)
xml Paper Specification (.XPS)
Supported by oembed:
flickr.com
youtube.com
hulu.com
vimeo.com
slideshare.net
qik.com
polleverywhere.com
wordpress.com
revision3.com
viddler.com
This is implemented in the web2py file gluon.contrib.autolinks and specifically in the function expand_one. You can extend oembed support by registering more services. This is done by appending an entry to the EMBED_MAPS list:
from gluon.contrib.autolinks import EMBED_MAPS
EMBED_MAPS.append((re.compile('http://vimeo.com/\S*'),
                   'http://vimeo.com/api/oembed.json'))
Referencing wiki content
If you create a wiki page with slug "contactus" you can refer to this page as
@////contactus
Here @//// stands for
@/app/controller/function/
but "app", "controller", and "function" are omitted thus assuming default.
Similarly you can use the wiki menu to upload a media file (for example an image) linked to the page. The "manage media" page will show all the files you have uploaded and will also show the proper expression to link the media file. If, for example you upload a file named "test.jpg" with title "beach", the link expression will be something like:
@////15/beach.jpg
@//// is the same prefix described before. 15 is the id of the record storing the media file. beach is the title. .jpg is the extension of the original file.
If you cut and paste @////15/beach.jpg into wiki pages you embed the image.
Mind that media files are linked to pages and inherit access permission from the pages.
Wiki menus
If you create a page with slug "wiki-menu" page it will be interpreted as a description of the menu. Here is an example:
- Home > @////index
- Info > @////info
- web2py > http://www.web2py.com
- - About us > @////aboutus
- - Contact us > @////contactus
Each line a menu item. We used double dash for nested menu items. The > symbols separates the menu item title from the menu item link.
Mind that the menu is appended to response.menu. It does not replace it. The [wiki] menu item with service functions is added automatically.
Service functions
If, for example, you want to use the wiki to create an editable sidebar you could create a page with slug="sidebar" and then embed it in your layout.html with
{{=auth.wiki(slug='sidebar')}}
Notice that there is nothing special with the word "sidebar". Any wiki page can be retrieved and embedded at any point in your code. This allows you mix and match wiki functionalities with regular web2py functionalities.
Also note that
is the same asauth.wiki('sidebar'), since the slug kwarg is the first in the method signature. The former gives a slightly simpler syntax.auth.wiki(slug='sidebar')
You can also embed special wiki functions such as the search by tags:
{{=auth.wiki('_search')}}
or the tag cloud:
{{=auth.wiki('_cloud')}}
Extending the auth.wiki feature
When your wiki-enabled app gets more complicated, perhaps you might need to customize the wiki db records managed by the Auth interface or expose customized forms for wiki CRUD tasks. For example, you might want to customize a wiki table record representation or add a new field validator. This is not allowed by default, since the wiki model is defined only after the wiki interface is requested with the auth.wiki() method. To allow access to the wiki specific db setup within the model of your app you must add the following sentence to your model file (i.e. db.py)
# Make sure this is called after the auth instance is created
# and before any change to the wiki tables
auth.wiki(resolve=False)
By using the line above in your model, the wiki tables will be accessible (i.e. wiki_page) for custom CRUD or other db tasks.
Note that you still have to call auth.wiki() in the controller or view in order to expose the wiki interface, since the
resolve=Falseparameter instructs the auth object to just build the wiki model without any other interface setup.
Also, by setting resolve to False in the method call, the wiki tables will be now accessible through the app's default db interface at <app>/appadmin for managing wiki records.
Another customization possible is adding extra fields to the standard wiki tables (in the same way as with the auth_user table, as described in Chapter 9). Here is how:
# Place this after auth object initialization
auth.settings.extra_fields["wiki_page"] = [Field("ablob", "blob"), ]
The line above adds a blob field to the wiki_page table. There is no need to call
auth.wiki(resolve=False)
Components
One of the most powerful functions of the new web2py consists in the ability of embedding an action inside another action. We call this a component.
Consider the following model:
db.define_table('thing', Field('name', requires=IS_NOT_EMPTY()))
and the following action:
@auth.requires_login()
def manage_things():
    return SQLFORM.grid(db.thing)
This action is special because it returns a widget/helper not a dict of objects. Now we can embed this manage_things action into any view, with
{{=LOAD('default', 'manage_things', ajax=True)}}
This allows the visitor interact with the component via Ajax without reloading the host page that embeds the widget. The action is called via Ajax, inherits the style of the host page, and captures all form submissions and flash messages so that they are handled within the current page. On top of this the SQLFORM.grid widget uses digitally signed URLs to restrict access. More information about components can be found in chapter 13.
Components like the one above can be embedded into wiki pages using the MARKMIN syntax:
ValueError: malformed string
This simply tells web2py that we want to include the "manage_things" action defined in the "default" controller as an Ajax "component".
Most users will be able to build relatively complex applications simply by using
auth.wikito create pages and menus and embedded custom components into wiki pages. Wikis can be thought of as a mechanism to allow members of the group to create pages, but they can also be thought of as a way to develop applications in a modular way.
More on admin
The administrative interface provides additional functionality that we briefly review here.
Site
This page is the main administrative interface of web2py. It lists all installed applications on the left, while on the right side there are some special action forms.
The first of them shows the web2py version and proposes to upgrade it if new versions are available. Of course, before upgrading be sure to have a full working backup! Then there are two other forms that allow the creation of a new application (simple or by using an online wizard) by specifying its name.
https://github.com/rochacbruno/Movuca
or Instant Press CMS created by Martin Mulone:
http://code.google.com/p/instant-press/
or one of the many example applications available at:
http://web2py.com/appliances
Web2py files are packages as
.w2pfiles. These are tar gzipped files. Web2py uses the.w2pextension instead of the.tgzextension to prevent the browser from unzipping on download. They can be uncompressed manually withtar xzvf [filename]although this is never necessary.

Upon successful upload, web2py displays the MD5 checksum of the uploaded file. You can use it to verify that the file was not corrupted during upload. The application name will appear in the list of installed applications.
If you run web2py from source and you have gitpython installed (if necessary, set it up with 'easy_install gitpython'), you can install applications directly from git repositories using the .git URL in the upload form. In this case you will also be enabled to use the admin interface to push changes back into the repository, but this is an experimental feature.
For example, you can locally install the application that shows this book on the web2py site with the URL:
https://github.com/web2py/web2py-book.git
That repository hosts the current, updated version of this book (which could be different from the stable version you can see on the web site). You are warmly invited to use it for submitting improvements, fixes and corrections in the form of pull requests.
For each application installed you can use the site page to:
- Go directly to the application by clicking on its name.
- Uninstall the application.
- Jump to the about page (read below).
- Jump to the edit page (read below).
- Jump to the errors page (read below).
- Clean up temporary files (sessions, errors, and cache.disk files).
- Pack all. This returns a tar file containing a complete copy of the application. We suggest that you clean up temporary files before packing an application.
- Compile the application. If there are no errors, this option will bytecode-compiles all models, controllers and views. Because views can extend and include other views in a tree, before bytecode compilation, the view tree for every controller is collapsed into a single file. The net effect is that a bytecode-compiled application is faster, because there is no more parsing of templates or string substitutions occurring at runtime.
- Pack compiled. This option is only present for bytecode-compiled applications. It allows packing the application without source code for distribution as closed source. Note that Python (as any other programming language) can technically be decompiled; therefore compilation does not provide complete protection of the source code. Nevertheless, de-compilation can be difficult and can be illegal.
- Remove compiled. It simply removes the byte-code compiled models, views and controllers from the application. If the application was packaged with source code or edited locally, there is no harm in removing the bytecode-compiled files, and the application will continue to work. If the application was installed form a packed compiled file, then this is not safe, because there is no source code to revert to, and the application will no longer work.
All the functionality available from the web2py admin site page is also accessible programmatically via the API defined in the module
gluon/admin.py. Simply open a python shell and import this module.
If the Google App Engine SDK is installed the admin site page shows a button to push your applications to GAE. If python-git is installed, there is also a button to push your application to Open Shift. To install applications on Heroku or other hosting system you should look into the "scripts" folder for the appropriate script.
About
The about tab allows editing the description of the application and its license. These are written respectively in the ABOUT and LICENSE files in the application folder.

You can use MARKMIN, or gluon.contrib.markdown.WIKI syntax for these files as described in ref.[markdown2] .
Design
You have used the edit page already in this chapter. Here we want to point out a few more functionalities of the edit page.
- If you click on any file name, you can see the contents of the file with syntax highlighting.
- If you click on edit, you can edit the file via a web interface.
- If you click on delete, you can delete the file (permanently).
- If you click on test, web2py will run tests. Tests are written by the developer using Python doctests, and each function should have its own tests.
- You can add language files, scan the app to discover all strings, and edit string translations via the web interface.
- If the static files are organized in folders and subfolders, the folder hierarchy can be toggled by clicking on a folder name.
The image below shows the output of the test page for the welcome application.

The image below show the languages tab for the welcome application.

The image below shows how to edit a language file, in this case the "it" (Italian) language for the welcome application.

Integrated web-based debugger
(requires Python 2.7 or later)
The web2py admin includes a web-based debugger.
Using the provided web-based editor you can add breakpoints to the Python code and, from the associated debugger console, you can inspect the system variables at those breakpoints and resume execution. This is illustrated in the following screenshot: The interactive console also serves as a python scratchpad.

This functionality is based on the Qdb debugger created by Mariano Reingart. It uses multiprocessing.connection to communicate between the backend and frontend, with a JSON-RPC-like stream protocol. [qdb]
Setting breakpoints via code
Include this:
from gluon.debug import dbg
and to drop into the debugger, put this in the desired location:
dbg.set_trace()
The debugger app has a breakpoint manager.
Notes: web2py does not know whether you actually have a debug window open in your browser; execution suspends regardless. IDEs usually have their own inter-process debugger, e.g. PyCharm or PyDev. They may complain if you include the gluon library.
Web-based Python shell
If you click on the "shell" link under the controllers tab in edit, web2py will open a web based Python shell and will execute the models for the current application. This allows you to interactively talk to your application.

Be careful using the web based shell - because different shell requests will be executed in different threads. This easily gives errors, especially if you play with databases creation and connections. For activities like these (i.e. if you need persistence) it's much better to use the python command line.
Crontab
Also under the controllers tab in edit there is a "crontab" link. By clicking on this link you will be able to edit the web2py crontab file. This follows the same syntax as the Unix crontab but does not rely on Unix. In fact, it only requires web2py, and it works on Windows. It allows you to register actions that need to be executed in background at scheduled times. For more information about this, see the next chapter.
Errors
When programming web2py, you will inevitably make mistakes and introduce bugs. web2py helps in two ways: 1) it allows you to create tests for every function that can be run in the browser from the edit page; and 2) when an error manifests itself, a ticket is issued to the visitor and the error is logged.
Intentionally introduce an error in the images application as shown below:
def index():
    images = db().select(db.image.ALL, orderby=db.image.title)
    1/0
    return dict(images=images)
When you access the index action, you get the following ticket:

Only the administrator can access the ticket:

The ticket shows the traceback, and the content of the file that caused the problem, and the complete state of system (variables, request, session, etc.) If the error occurs in a view, web2py shows the view converted from HTML into Python code. This allows to easily identify the logical structure of the file.
By default tickets are stored on filesystem and displayed grouped by traceback. The administrative interface provides an aggregate views (type of traceback and number of occurrence) and a detailed view (all tickets are listed by ticket id). The administrator can switch between the two views.
Notice that everywhere admin shows syntax-highlighted code (for example, in error reports, web2py keywords are shown in orange). If you click on a web2py keyword, you are redirected to a documentation page about the keyword.
If you fix the divide-by-zero bug in the index action and introduce one in the index view:
{{extend 'layout.html'}}

<h1>Current Images</h1>
<ul>
{{for image in images:}}
{{1/0}}
{{=LI(A(image.title, _href=URL("show", args=image.id)))}}
{{pass}}
</ul>
you get the following ticket:

Note that web2py has converted the view from HTML into a Python file, and the error described in the ticket refers to the generated Python code and NOT to the original view file:

This may seem confusing at first, but in practice it makes debugging easier, because the Python indentation highlights the logical structure of the code that you embedded in the views.
The code is shown at the bottom of the same page.
All tickets are listed under admin in the errors page for each application:
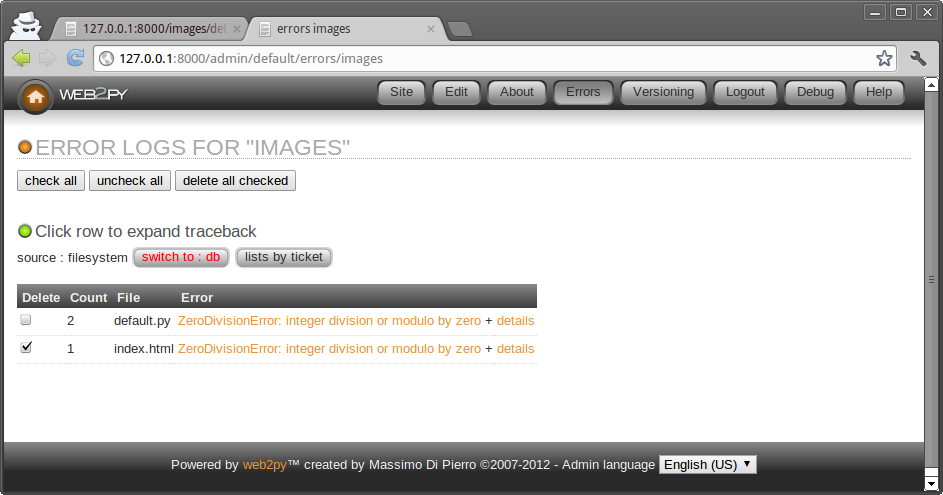
Mercurial
If you are running from source, the administrative interface shows one more menu item called "Versioning".

Entering a comment and pressing the "commit" button in the resulting page will commit the current application. With the first commit, a local Mercurial repository for the specific application will be created. Under the hood, Mercurial stores information about changes you make in your code into a hidden folder ".hg" in your app subfolder. Every app has its own ".hg" folder and its own ".hgignore" file (tells Mercurial which files to ignore). In order to use this feature, you must have the Mercurial version control libraries installed (at least version 1.9):
pip install mercurial
The Mercurial web interface does allow you to browse previous commit and diff files but we do recommend you use Mercurial directly from the shell or one of the many GUI-based Mercurial clients since they are more powerful. For example they will allow you to sync your app with a remote source repository.
You can read more about Mercurial here:
http://mercurial.selenic.com/
Git integration
The admin app also includes git integration. Python git libraries are required, e.g.
pip install gitpython
and then per application, you must clone or otherwise configure a git repository.
After these steps, the Manage menu for each git-managed application will show git push and git pull. Applications which are not managed by git are ignored. You can pull and push apps from the default remote repository.
Application Wizard (experimental)
The admin interface includes a Wizard that can help you create a new applications. You can access the wizard from the "site" page as shown in the image below.

The wizard will guide you through a series of steps involved in creating a new application:
- Chose a name for the application
- Configure the application and choose required plugins
- Build required models (it will create CRUD pages for each model)
- Allow you to edit the views of those pages using MARKMIN syntax
The image below shows the second step of the process.

You can see a dropdown to select a layout plugin (from web2py.com/layouts), a multiple choice dropdown to check other plugins (from web2py.com/plugins) and a "login config" field where to put the Janrain "domain:key".
The other steps are pretty much self-explanatory.
The Wizard works well for what it does but it is considered an experimental feature for two reasons:
- Applications created with the wizard and edited manually, cannot later be modified by the wizard.
- The interface of the wizard will change over time to include support for more features and easier visual development.
In any case the wizard is a handy tool for fast prototyping and it can be used to bootstrap a new application with an alternate layout and optional plugins.
Configuring admin
Normally there is no need to perform any configuration of admin but a few customizations are possible. After you login into admin you can edit the admin configuration file via the URL:
http://127.0.0.1:8000/admin/default/edit/admin/models/0.py
Notice that admin can be used to edit itself. In fact admin is an app as any other one.
The file "0.py" is more or less self documented, anyway, here are some of the most important possible customizations:
GAE_APPCFG = os.path.abspath(os.path.join('/usr/local/bin/appcfg.py'))
This should point to the location of the "appcfg.py" file that comes with the Google App Engine SDK. If you have the SDK you may want to change these config parameters to the correct value. It will allow you to deploy to GAE from the admin interface.
You can also set web2py admin in demo mode:
DEMO_MODE = True
FILTER_APPS = ['welcome']
And only the apps listed in FILTER_APPS will be accessible and they will be only accessible in read-only mode.
If you are a teacher and want to expose the administrative interface to students so that students can share one administrative interface for their projects (think of a virtual lab), can do it by setting:
MULTI_USER_MODE = True
In this way students will be required to login and will only be able to access their own apps via admin. You, as first user/teacher, will be able to access them all.
In multi user mode, you can register students using the "bulk register" link in admin and manage them using the "manage students" link. The system also keeps track of when students login and how many lines of code they add/remove to/from their code. This data is presented to the administrator as charts under the application "about" page.
Mind that this mechanism still assumes all users are trusted. All the apps created under admin run under the same credentials on the same filesystem. It is possible for an app created by a student to access the data and the source of an app created by another student. It is also possible for a student to create an app that locks the server.
Mobile admin
Notice that the admin application includes "plugin_jqmobile" which packages jQuery Mobile. When admin is accessed from a mobile device, this is detected by web2py and the interface is displayed using a mobile-friendly layout:

More on appadmin
appadmin is not intended to be exposed to the public. It is designed to help you by providing an easy access to the database. It consists of only two files: a controller "appadmin.py" and a view "appadmin.html" which are used by all actions in the controller.
The appadmin controller is relatively small and readable; it provides an example of designing a database interface.
appadmin shows which databases are available and which tables exist in each database. You can insert records and list all records for each table individually. appadmin paginates output 100 records at a time.
Once a set of records is selected, the header of the pages changes, allowing you to update or delete the selected records.
To update the records, enter an SQL assignment in the Query string field:
title = 'test'
where string values must be enclosed in single quotes. Multiple fields can be separated by commas.
To delete a record, click the corresponding checkbox to confirm that you are sure.
appadmin can also perform joins if the query contains a SQL condition that involves two or more tables. For example, try:
db.image.id == db.post.image_id
web2py passes this along to the DAL, and it understands that the query links two tables; hence, both tables are selected with an INNER JOIN. Here is the output:

If you click on the number of an id field, you get an edit page for the record with the corresponding id.
If you click on the number of a reference field, you get an edit page for the referenced record.
You cannot update or delete rows selected by a join, because they involve records from multiple tables and this would be ambiguous.
In addition to its database administration capabilities, appadmin also enables you to view details about the contents of the application's cache (at /yourapp/appadmin/cache) as well as the contents of the current request, response, and session objects (at /yourapp/appadmin/state).
appadmin replaces response.menu with its own menu, which provides links to the application's edit page in admin, the db (database administration) page, the state page, and the cache page. If your application's layout does not generate a menu using response.menu, then you will not see the appadmin menu. In that case, you can modify the appadmin.html file and add {{=MENU(response.menu)}} to display the menu.